One of the fundamental components for organizing and navigating through content in a mobile application is by using a tabbar at the bottom of the screen. In this blog post, we’ll explore how we can easily create a tabbar in SwiftUI by using the native tabview.
In this blog post I will provide you with practical examples to help you master the native tabview.
SwiftUI tabview example
We will begin with a basic example implementing a tabview in SwiftUI.
When you click on a item in a tabview you will present a new view to the user. Therefore it makes sense to have a master or main view where you place the tabview.
In the following example we will create 3 SwiftUI views where we will name one MainView, one OrderView and one DeliveryView. Then we will create a tabview where we can navigate between the views.
OrderView.swift
import SwiftUI

struct OrderView: View {
    var body: some View {
        Text("Order View")
    }
}
DeliveryView.swift
import SwiftUI

struct DeliveryView: View {
    var body: some View {
        Text("Delivery view")
    }
}
MainView.swift
import SwiftUI

struct MainView: View {
    var body: some View {
        TabView {
            OrderView()
                .tabItem {
                    Label("Orders", systemImage: "envelope")
                }

            DeliveryView()
                .tabItem {
                    Label("Delivery", systemImage: "car")
                }
        }    }
}
The result:
SwiftUI tabview more tab
The tabview can only contain 5 tab buttons, but if you have a tabbar and you feel the need to have more then 5 item, you just add as many as you feel like. The TabView will create a “more” menu item at the right where the last tab items will be.
In the following example we will create a tabbar/tabview containing 7 tab items:
import SwiftUI

struct MainView: View {
    var body: some View {
        TabView {
            OrderView()
                .tabItem {
                    Label("Orders", systemImage: "envelope")
                }

            DeliveryView()
                .tabItem {
                    Label("Delivery 1", systemImage: "car")
                }
            DeliveryView()
                .tabItem {
                    Label("Delivery 2", systemImage: "car")
                }
            DeliveryView()
                .tabItem {
                    Label("Delivery 3", systemImage: "car")
                }
            DeliveryView()
                .tabItem {
                    Label("Delivery 4", systemImage: "car")
                }
            DeliveryView()
                .tabItem {
                    Label("Delivery 5", systemImage: "car")
                }
            DeliveryView()
                .tabItem {
                    Label("Delivery 6", systemImage: "car")
                }
        }
    }
}
The result:
SwiftUI tabview selected color
By default the color of the selected tab is blue but you might want to change that color to something else.
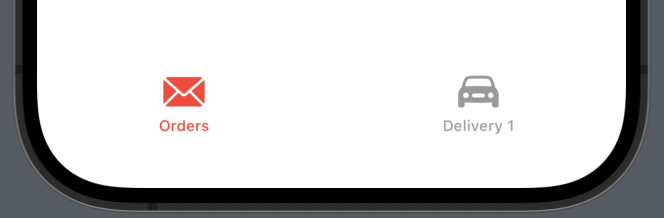
You can change the color of the selected color by using .tint modifier on the TabView. In the following example we will change to color to red:
import SwiftUI

struct MainView: View {
    var body: some View {
        TabView {
                OrderView()
                    .tabItem {
                        Label("Orders", systemImage: "envelope")
                    }

                DeliveryView()
                    .tabItem {
                        Label("Delivery 1", systemImage: "car")
                    }

        }
        .tint(Color.red)
    }
}
The result:
Tabview background color iOS16+
If you are working on a app that is running on iOS16 or newer you can use the .toolbarBackground modifier.
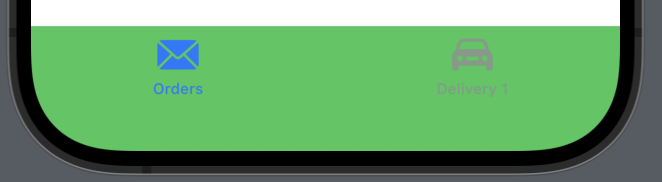
First you need to set the color you want and next you need to make it visable. In the following example we will change the background color to green. We will wrap the tab items in a Group so they all have the same background:
import SwiftUI

struct MainView: View {
    var body: some View {
        TabView {
            Group {
                OrderView()
                    .tabItem {
                        Label("Orders", systemImage: "envelope")
                    }

                DeliveryView()
                    .tabItem {
                        Label("Delivery 1", systemImage: "car")
                    }
            }
            .toolbarBackground(.green, for: .tabBar)
            .toolbarBackground(.visible, for: .tabBar)
        }
    }
}
The result:

Tabview background color iOS 15 and earlier
However if you are working on a app running iOS 15 or earlier you can’t use the .toolbarBackground modifier but instead you need to use a bit of UIKit on appear.
In the following example we will again make the background green, but we will do it by using UITabBar.appearance().backgroundColor when the view appears:
import SwiftUI

struct MainView: View {
    var body: some View {
        TabView {
            Group {
                OrderView()
                    .tabItem {
                        Label("Orders", systemImage: "envelope")
                    }

                DeliveryView()
                    .tabItem {
                        Label("Delivery 1", systemImage: "car")
                    }
            }

        }
        .onAppear() {
            UITabBar.appearance().backgroundColor = UIColor(.green)
        }
    }
}
The result:
SwiftUI tabview change tab programmatically
In order to change tab in a tabview programmatically, you first need to make every tab unique. We will make the tabs unique by adding .tag to every tabItem and then we can use that id to switch tabs programmatically.
In the following example we will create a state variable that holds the selected tab id, then add that variable to the tabView and we will add .tag to every tabItem:
import SwiftUI

struct MainView: View {
    @State var selectedTab: Int = 1
    var body: some View {
        Button {
            selectedTab = 2
        }label: {
            Text("Button")
        }
        TabView(selection: $selectedTab) {
            Group {
                OrderView()
                    .tabItem {
                        Label("Orders", systemImage: "envelope")
                    }
                    .tag(1)
                DeliveryView()
                    .tabItem {
                        Label("Delivery ", systemImage: "car")
                    }
                    .tag(2)
            }
            .toolbar(.visible, for: .tabBar)
            .toolbarBackground(Color.red, for: .tabBar)
        }
    }
}
The result:
Tabview in SwiftUI Wrap up
The TabView is a essential component in SwiftUI for creating organized and user-friendly interfaces. In this blog post we have covered how to create a tabbar and how to customize it to fit your needs.
I hope you enjoyed the article and can use it in your app.