In this tutorial, you will learn how to use List in SwiftUI. I have included the most basic usages of List that includes list with strings, objects, sections, styles, delete, selection and of course pull to refresh.
A List in SwiftUI is a container view that presents rows of data arranged in a single column. It can be used to display a vertically scrolling list of items, where each item is a separate row. A List is a fundamental building block of a SwiftUI app, and it provides several features out-of-the-box, such as automatic scrolling, dynamic row heights, and support for sectioned lists.
Basic use of list
SwiftUI list from string array
Let’s start with the most basic usage of a List() and that must be to display an array of strings in a List().
First, create a SwiftUI file called ListTutorialView, then create a variable with an array of strings.
After then, in the body of the view create a list that loops the array:
import SwiftUI

struct ListTutorialView: View {
    let stringsToList: [String] = ["Hello", "world", "What", "is", "going", "on?"]
    var body: some View {

        List(stringsToList, id: \.self){ stringToShow in
            Text(stringToShow)
        }
    }
}

struct ListTutorialView_Previews: PreviewProvider {
    static var previews: some View {
        ListTutorialView()
    }
}
And that will display the following list:
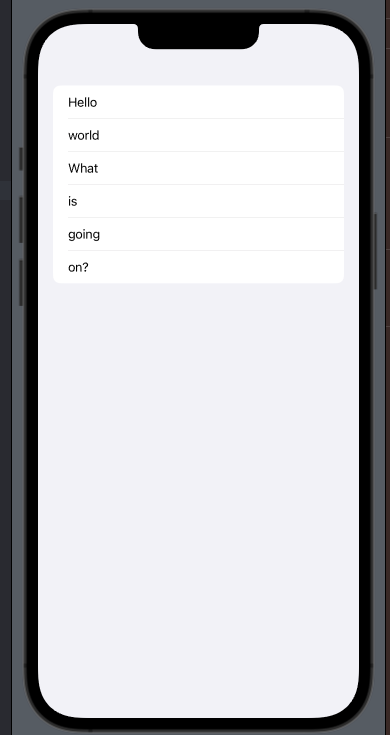
As you can see, we created an array called stringsToList and filled it with some strings.
There is nothing really fancy going on, but you might be thinking about what the id: \.self is and what is a good observation!
Simply put you need to pass an array that conforms to Identifiable and string does not, so to get around that we simply add the string (aka. .self) as Identifiable.
SwiftUI list from Array of objects
So far so good, but let’s make it a bit harder and a bit more useful. Typically you have an array of objects you need to display in a List(). Thankfully this is super simple in SwiftUI.
Let’s say you have a list of orders in a restaurant you want to display in a list format.
First, you get a list of orders from an API that you pass into an array of objects.
Our object will have the name OrderModel and contain the table number, drink name, and dish name.
struct OrderModel: Codable {
  var tableNumber: Int
  var dishName: String
  var drinkName: String
}
Now let’s change our array of strings to be an array of orders and change to name to arrayOfOrders.
let arrayOfOrders: [OrderModel] = [
OrderModel(
  tableNumber: 1,
  dishName: "Pasta with salmon",
  drinkName: "Beer"),
OrderModel(
  tableNumber: 22,
  dishName: "Veggie pasta",
  drinkName: "root beer")]
As you can see we created an array that contains three orders. Now we will display these orders in a list.
List(arrayOfOrders, id: \.tableNumber){ order in
            Text(
              "Table number: \(order.tableNumber) -
              dish name: \(order.dishName) -
              drink name \(order.drinkName)")
}
And that will produce the following list

Here you can see the syntax is pretty much the same, and we used the tableNumber as id. If your data comes from an actual API you will properly have a id and conform to Identifiable — it is important the id is unique.
Navigation in list
Now we have created two different lists we want to learn how to navigate in our list.
Let’s say our list of orders only shows the table number and you have to click on the order to get the details aka. dish name and drink name.
First, create a new SwiftUI view called OrderDetailsView. The OrderDetailsView will contain one order and display the details.
import SwiftUI

struct OrderDetailsView: View {
    let order: OrderModel
    var body: some View {
        VStack {
            Text("Table \(order.tableNumber) have ordered \(order.dishName) and \(order.drinkName)")
        }
    }
}

struct OrderDetailsView_Previews: PreviewProvider {
    static var previews: some View {
        OrderDetailsView(order: OrderModel(tableNumber: 1, dishName: "test", drinkName: "test"))
    }
}
Navigation in iOS 16
Next, we will need to go back to our view that contains the list aka. ListTutorialView. Now we need to wrap our list in a Navigation stack and replace the Text() with a NavigationLink in order to be able to click on the details view. Our complete ListTutorialView will look like this:
import SwiftUI

struct ListTutorialView: View {
    let arrayOfOrders: [OrderModel] = [
    OrderModel(
      tableNumber: 1,
      dishName: "Pasta with salmon",
      drinkName: "Beer"),
    OrderModel(
      tableNumber: 22,
      dishName: "Veggie pasta",
      drinkName: "root beer")]

    var body: some View {
        NavigationStack {
            List(arrayOfOrders, id: \.tableNumber){ order in
                NavigationLink {
                    OrderDetailsView(order: order)
                } label: {
                    Text("Order for table \(order.tableNumber)")
                }
            }
        }
    }
}

struct ListTutorialView_Previews: PreviewProvider {
    static var previews: some View {
        ListTutorialView()
    }
}
With the changes you will have the following functionality:
As you can see, navigation for a list in iOS 16 is super simple and straightforward.
Navigation in iOS 15
If you are working on an app that needs to support iOS 15 and up, all you have to do is to change NavigationStack to NavigationView
NavigationView {
            List(arrayOfOrders, id: \.tableNumber){ order in
                NavigationLink {
                    OrderDetailsView(order: order)
                } label: {
                    Text("Order for table \(order.tableNumber)")
                }
            }
        }
List styles
There are different built-in styles you can add to a list.
automatic style
The automatic style is the default style added to a list, so if you want the automatic style, you don’t have to specify it.
Automatic will use the default list style of the platform, so the list might look different on MacOS and iOS.
insetGrouped style

grouped

inset

plain

sidebar
The sidebar style is quite a useful one since it adds a bit of functionality as well as style.
If you add sidebar style to a list with sections you will be able to expand and collapse the section. For example, let’s create a list with one section and ForEach our orders in the section.
List {
            Section(header: Text("Orders")) {
                ForEach(arrayOfOrders, id: \.tableNumber) { order in
                    Text(order.dishName)
                }
            }
        }
        .listStyle(.sidebar)
    }
Which will produce the following

List swipe to delete
In SwiftUI, you can implement a swipe to delete a list by using the ForEach and the onDelete modifier. The onDelete modifier takes a closure that is called when the user swipes to delete a row.
Here’s an example implementation in a SwiftUI View:
List {
            ForEach(arrayOfOrders, id: \.tableNumber) { order in
                Text(order.dishName)
            }
            .onDelete { index in
                arrayOfOrders.remove(atOffsets: index)
            }
        }
Or if you want to call a delete function you can do it like so:
List {
            ForEach(arrayOfOrders, id: \.tableNumber) { order in
                Text(order.dishName)
            }
            .onDelete(perform: delete)
        }

        .listStyle(.sidebar)
    }

    func delete(at offsets: IndexSet){
        arrayOfOrders.remove(atOffsets: offsets)
    }
Swiftui list pull to refresh
You can implement a “pull to refresh” feature in SwiftUI using the refreshable modifier on a List.
Here’s an example:
List {
            ForEach(arrayOfOrders, id: \.tableNumber) { order in
                Text(order.dishName)
            }
        }
        .refreshable {
            let newOrder = OrderModel(
                tableNumber: 666,
                dishName: "I pulled to refresh",
                drinkName: "root beer")
            arrayOfOrders.append(newOrder)
        }
In this example, the refreshable the modifier is applied to the List, and it creates a new order with the dish name “I pulled to refresh”. The closure is called when the user pulls down on the list to initiate a refresh. The closure updates the arrayOfORders with a new item.