Learn how to create and customize a Navigation Bar in SwiftUI — the essential component for effortless app navigation. Discover the power of SwiftUI’s declarative syntax to build modern and visually stunning apps that provide a seamless user experience.
SwiftUI navigation bar is a UI element that allows users to navigate between different views in an app. It is typically used to provide a hierarchical navigation experience, where users can move from a parent view to a child view, and then back to the parent view.
Creating a Navigation Bar in SwiftUI
Creating a Navigation Bar in SwiftUI is straightforward. You can add it to your view hierarchy using NavigationStack or NavigationView and NavigationLink.
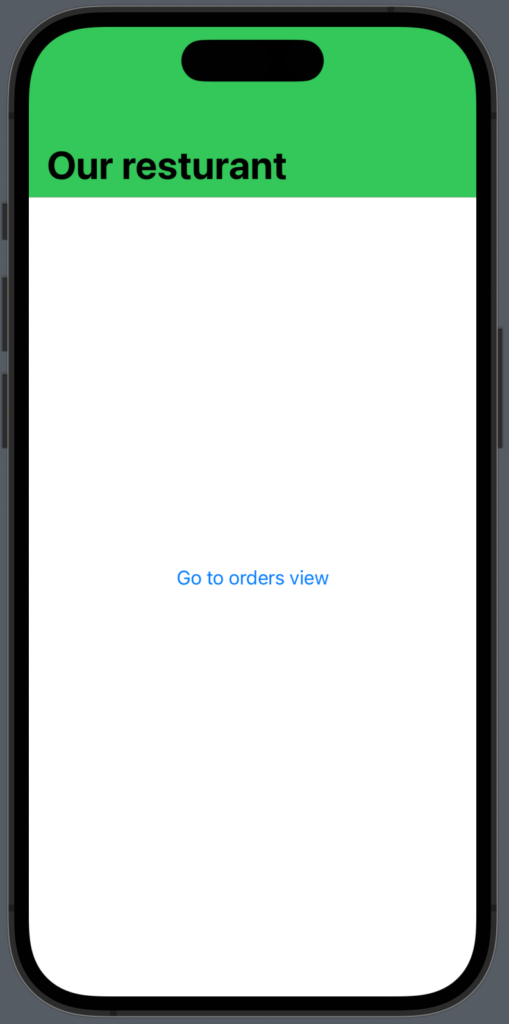
In the following example, we will create a navigation bar with the title “Our restaurant” and a navigation link that goes to the order view
Here’s an example:
struct NavigationBar: View {
    var body: some View {
        NavigationStack {
            VStack {
                NavigationLink(destination: DetailView()) {
                    Text("Go to orders view")
                }
            }
            .navigationTitle("Our restaurant")
        }
    }
}

struct DetailView: View {
    var body: some View {
        Text("Orders view")
            .navigationTitle("Order title")
    }
}
Which will produce the following result:
As you can see, implementing a navigation bar and creating navigation in your app is straightforward. You get a lot of functionality out of the box: you get the title, routing to new, and a back button — what’s not to like?
Customizing the Navigation Bar
The example above is quite simple and you properly want to customize your navigation bar a bit. In the following, you will learn how to customize the most common features.
SwiftUI navigation bar color
To set the background color of a navigation bar you need to add .toolbarBackground(“Color”, for: .navigationBar) right after our navigationTitle():
struct NavigationBar: View {
    var body: some View {
        NavigationStack {
            VStack {
                NavigationLink(destination: DetailView()) {
                    Text("Go to orders view")
                }
            }
            .navigationTitle("Our resturant")
            .toolbarBackground(Color.green, for: .navigationBar)
        }
    }
}

struct DetailView: View {
    var body: some View {
        Text("Orders view")
            .navigationTitle("Order title")
    }
}
At first, glance that doesn’t change the background color of your navigation bar and that is because by default the navigation bar only changes color if you scroll, so add a list to your view and you can see the background color change.
But if you want the background color to change even though you don’t scroll, add the following code .toolbarBackground(.visible, for: .navigationBar)
struct NavigationBar: View {
    var body: some View {
        NavigationStack {
            VStack {
                NavigationLink(destination: DetailView()) {
                    Text("Go to orders view")
                }
            }
            .navigationTitle("Our resturant")
            .toolbarBackground(Color.green, for: .navigationBar)
            .toolbarBackground(.visible, for: .navigationBar)
        }
    }
}
Which will produce the following view:
SwiftUI navigation bar hide the back button
If you want to hide the back button on a view you can add the following line of code .navigationBarBackButtonHidden(true) and poof it’s gone.
struct DetailView: View {
    var body: some View {
        Text("Orders view")
            .navigationTitle("Order title")
            .navigationBarBackButtonHidden(true)
    }
}
SwiftUI navigation bar button
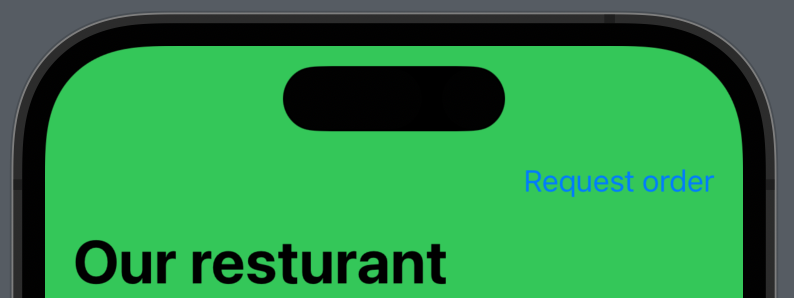
By using the toolbar() modifier we can easily add one or more buttons to our navigation bar.
Let’s create one button titled “Request order” that prints “Let’s request a new order!”:
struct NavigationBar: View {
    var body: some View {
        NavigationStack {
            VStack {
                NavigationLink(destination: DetailView()) {
                    Text("Go to orders view")
                }
            }

            .navigationTitle("Our resturant")
            .toolbarBackground(Color.green, for: .navigationBar)
            .toolbarBackground(.visible, for: .navigationBar)
            .toolbar {
                Button("Request order") {
                    print("Let's request a new order!")
                }

            }
        }
    }
}
The code will produce the following view:
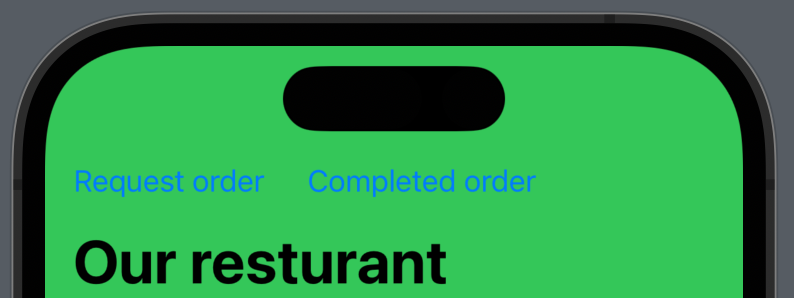
Add multiple buttons to your navigation bar
If you want to add multiple buttons to your navigation bar you simply wrap your buttons in a ToolbarItemGroup().
Here we have an example where we add two buttons to our navigation bar and place them to the left:
struct NavigationBar: View {
    var body: some View {
        NavigationStack {
            VStack {
                NavigationLink(destination: DetailView()) {
                    Text("Go to orders view")
                }
            }
            .navigationTitle("Our resturant")
            .toolbarBackground(Color.green, for: .navigationBar)
            .toolbarBackground(.visible, for: .navigationBar)
            .toolbar {
                ToolbarItemGroup(placement: .navigationBarLeading) {
                    Button("Request order") {
                        print("Let's request a new order!")
                    }
                    Button("Completed order") {
                        print("Go to your completed order view!")
                    }
                }
            }
        }
    }
}
The result:
SwiftUI navigation bar add a button to the right
If you want to place your buttons to the right in the navigation bar use .navigationBarTrailing.
.toolbar {
                ToolbarItem(placement: .navigationBarTrailing) {
                    Button("Request order") {
                        print("Let's request a new order!")
                    }
                }
            }
The result:

SwiftUI navigation bar add a button to the left
If you want to place your buttons to the left in the navigation bar use .navigationBarLeading.
Button to left:
.toolbar {
                ToolbarItem(placement: .navigationBarLeading) {
                    Button("Request order") {
                        print("Let's request a new order!")
                    }
                }
            }
The result:

SwiftUI navigation bar title center
If you want to center the title in the navigationbar you can do it in two different ways:
- You can use the .navigationBarTitleDisplayMode(.inline) modifier.
- You can use the .navigationBarTitle modifier and use the displayMode parameter.
They both center the title in your navigationbar.
VStack {
    NavigationLink(destination: DetailView()) {
         Text("Go to orders view")
    }
}
.navigationBarTitle("Our resturant", displayMode: .inline) //1. option
.navigationBarTitleDisplayMode(.inline) //2. option
The result:

Conclusion
Using a navigation bar in SwiftUI can be a good idea for a few reasons:
- Consistency: By using a navigation bar, you can provide a consistent navigation experience across your app. This can make it easier for users to understand how to navigate your app and can lead to a better user experience.
- Space-saving: A navigation bar takes up less space on the screen than other navigation UI elements like tabs or menus. This can be especially important on smaller screens like those found on mobile devices.
- Flexibility: SwiftUI navigation bar is highly customizable, allowing you to change its appearance, add buttons or other UI elements to it, and control its behavior. This can make it easier to tailor the navigation experience to your app’s specific needs.
Overall, using a SwiftUI navigation bar can help improve the user experience of your app and provide a consistent, space-saving, and flexible way for users to navigate through your app’s content.